|
DECISIV ACCESS
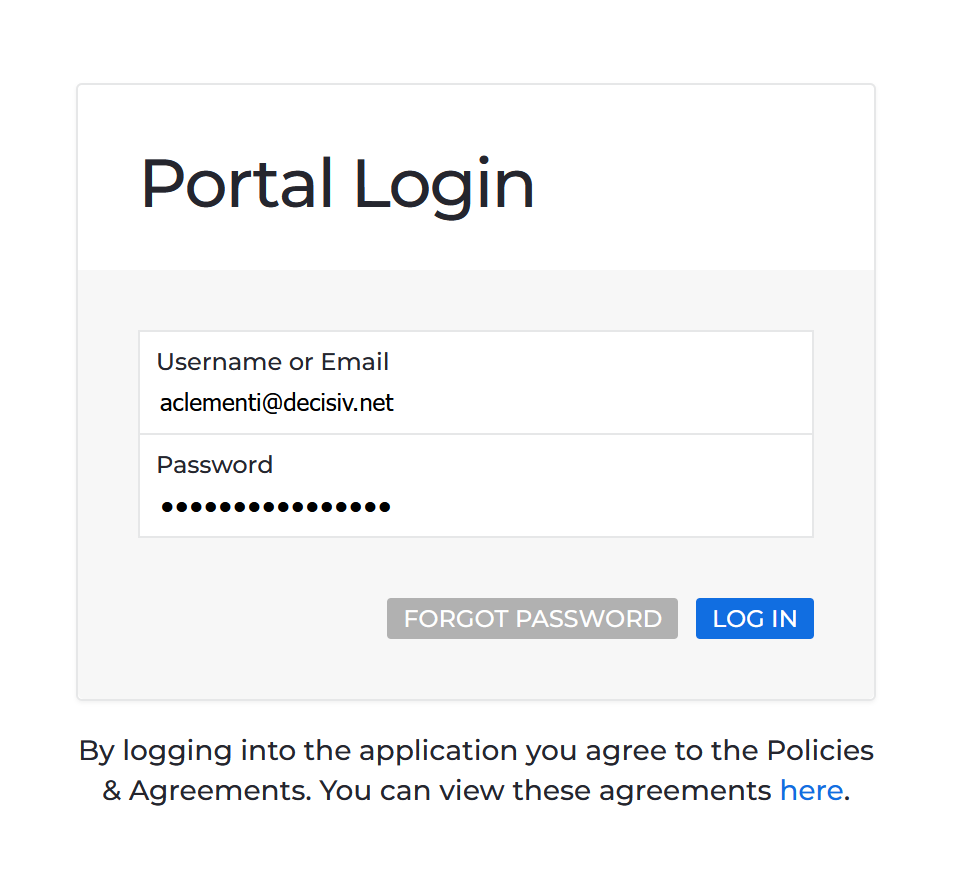
How to Log In
URL: https://dsmp.decisiv.net/
Username: Your Email Address
Password: Your password from initial setup
Troubleshooting and Tips:
- Bookmark the Decisiv Case url
-
Save your password
- Decisiv does not auto-log you out so you may not enter it very often
-
Use the Password Reset link if you can’t remember your password
|
 |
|
NAVIGATION
All Cases Screen
Background: This screen is where you can quickly scan your case info, such as status, customer, asset info, and click into each one to work on them for additional details.
You can customize the Cases screen by adding and removing columns, moving them around, or applying filters and sorting.
- Full Screen mode
- Column Display and Reordering
- Date Filter
- Column Filters
- Sorting Options
|
 |
|
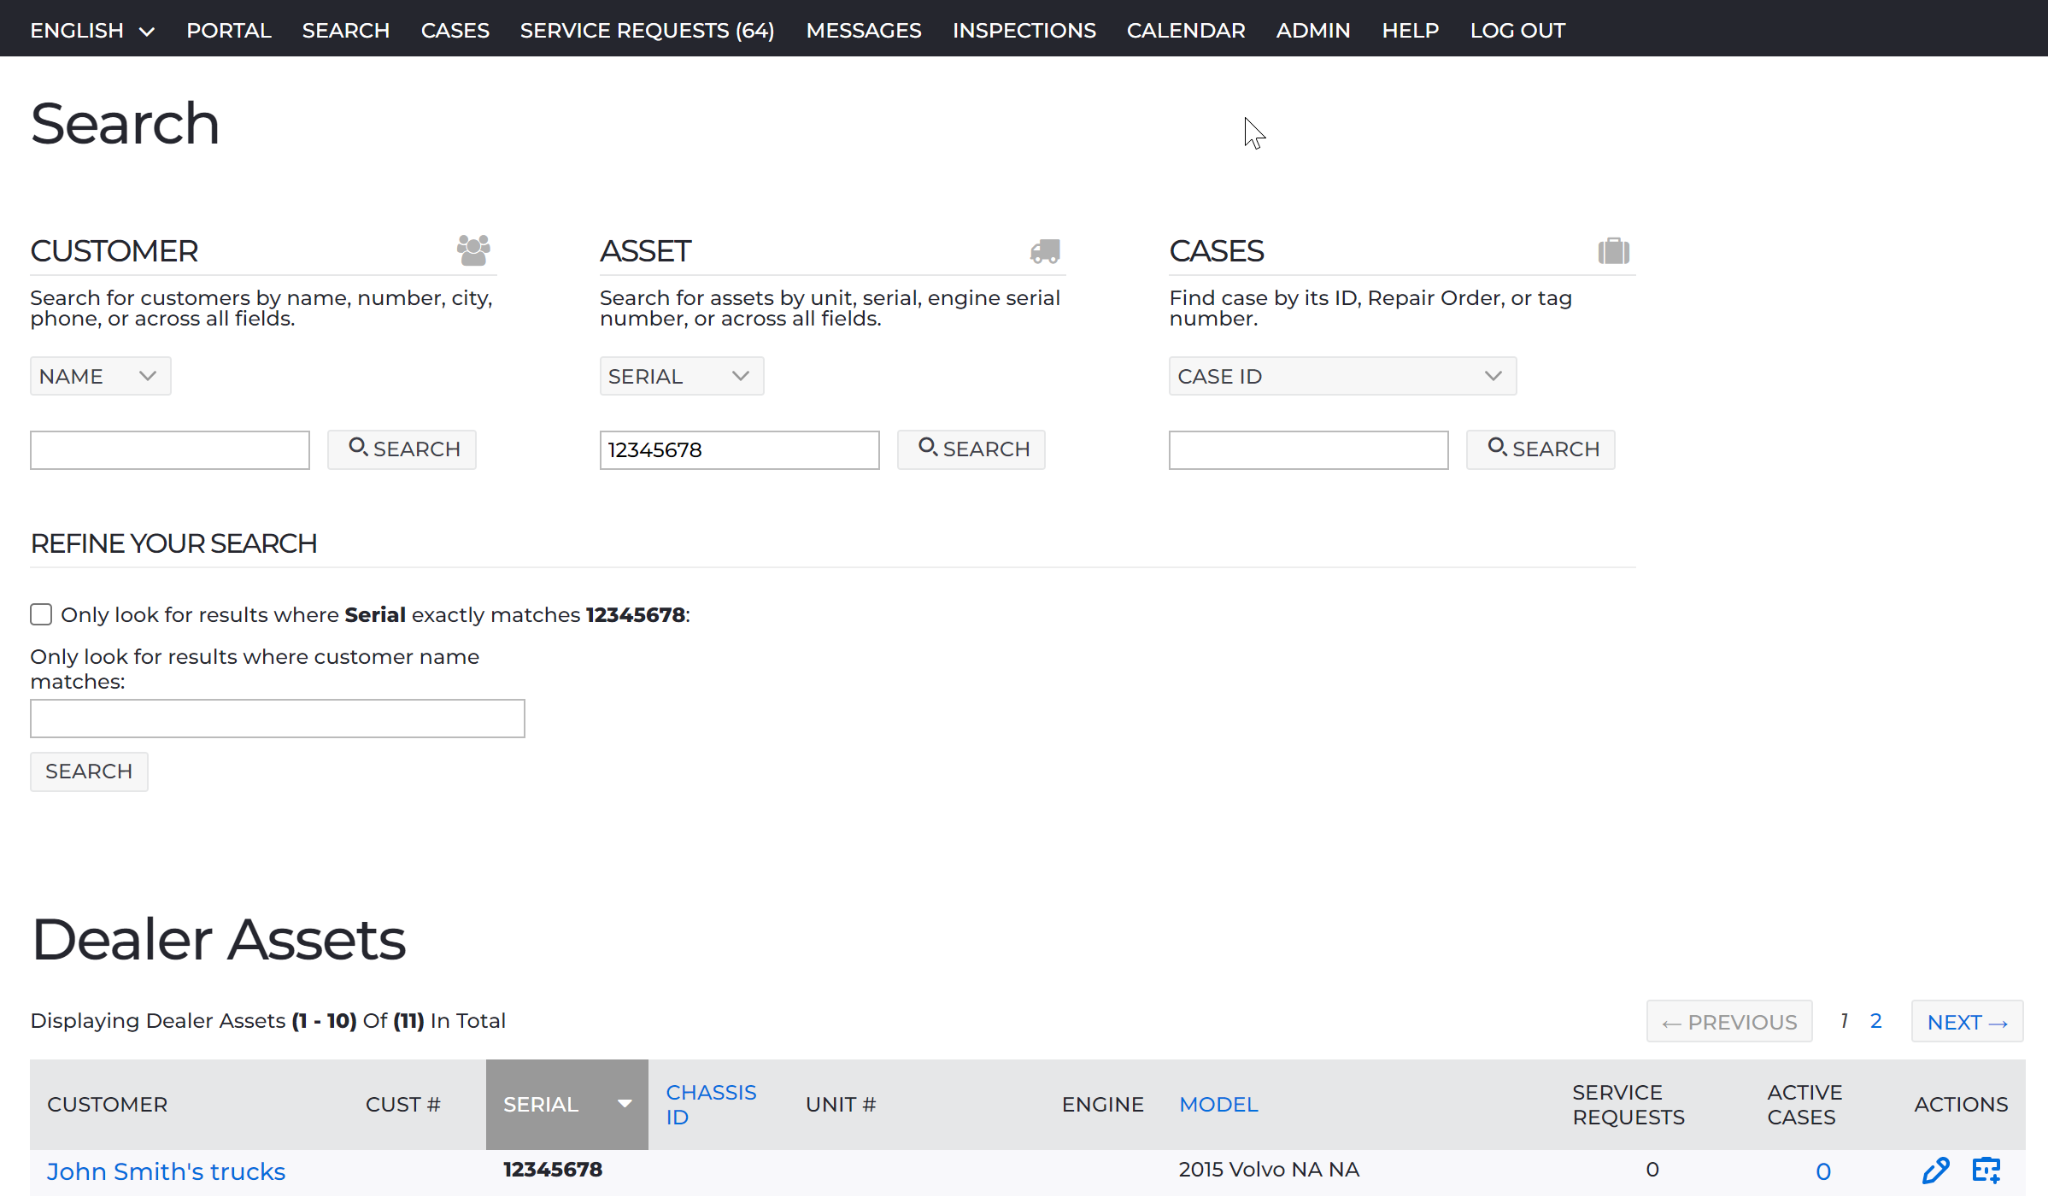
Search
Background: The Search page is where you can search for Customers, Assets, and Cases.
To access the Search page, open your location from the Portal, then click SEARCH in the top menu bar. A page with sections for searching customers, assets, or cases will display.
Decisiv Best Practices:
- For less overall clicks, search by asset to create Cases
- Specify a field to search by within the search categories
|
 |
|
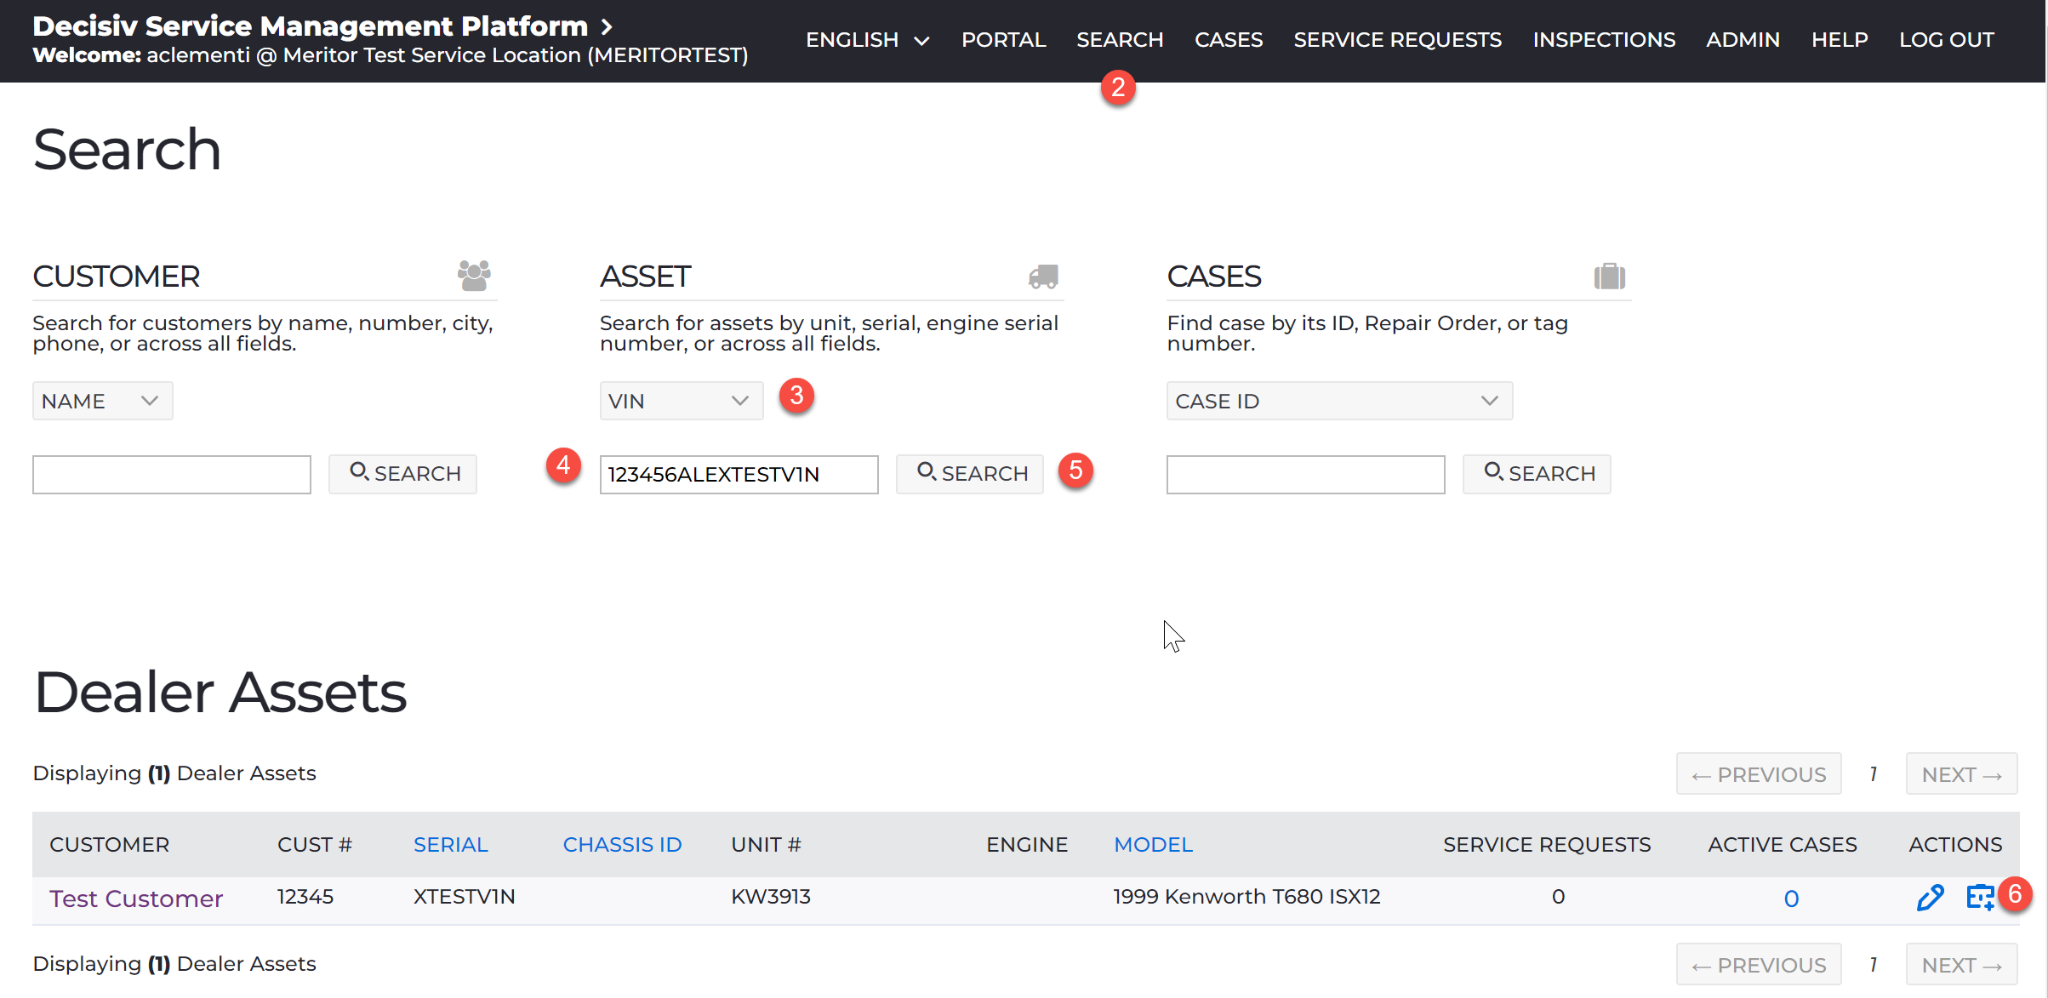
HOW TO CREATE A CASE
Service Provider users can create a new case directly from the asset search results.
To create a case from asset search results:
- Open your location from the Portal.
-
From the menu bar, click Search.
- In the Asset section, select a field to search by.
- Enter your search criteria.
-
Click SEARCH.
-
From the search results, in the ACTIONS column for the asset, click [New Case].
A case is created for that asset, and the Editing Case page opens for you to enter any additional information.
|
 |
|
HOW TO ADD THE INSPECTION
PC Steps
- After creating and entering a Case, scroll down to the Find Operation field and search ‘Meritor’.
-
Click on the inspection ‘Meritor 360 VIP - Drum Brakes Visual Inspection (SP20136)’ and then click the ‘Add Now’ button.
- On the Inspection Op page, click the ‘Forms’ section.
- Then click ‘DO INSPECTION’ on the right hand side.
- Switch to Mobile View (optional but this is how most users will use the inspection form)
***At this point the inspection has been added to the Case***
|
 |
|
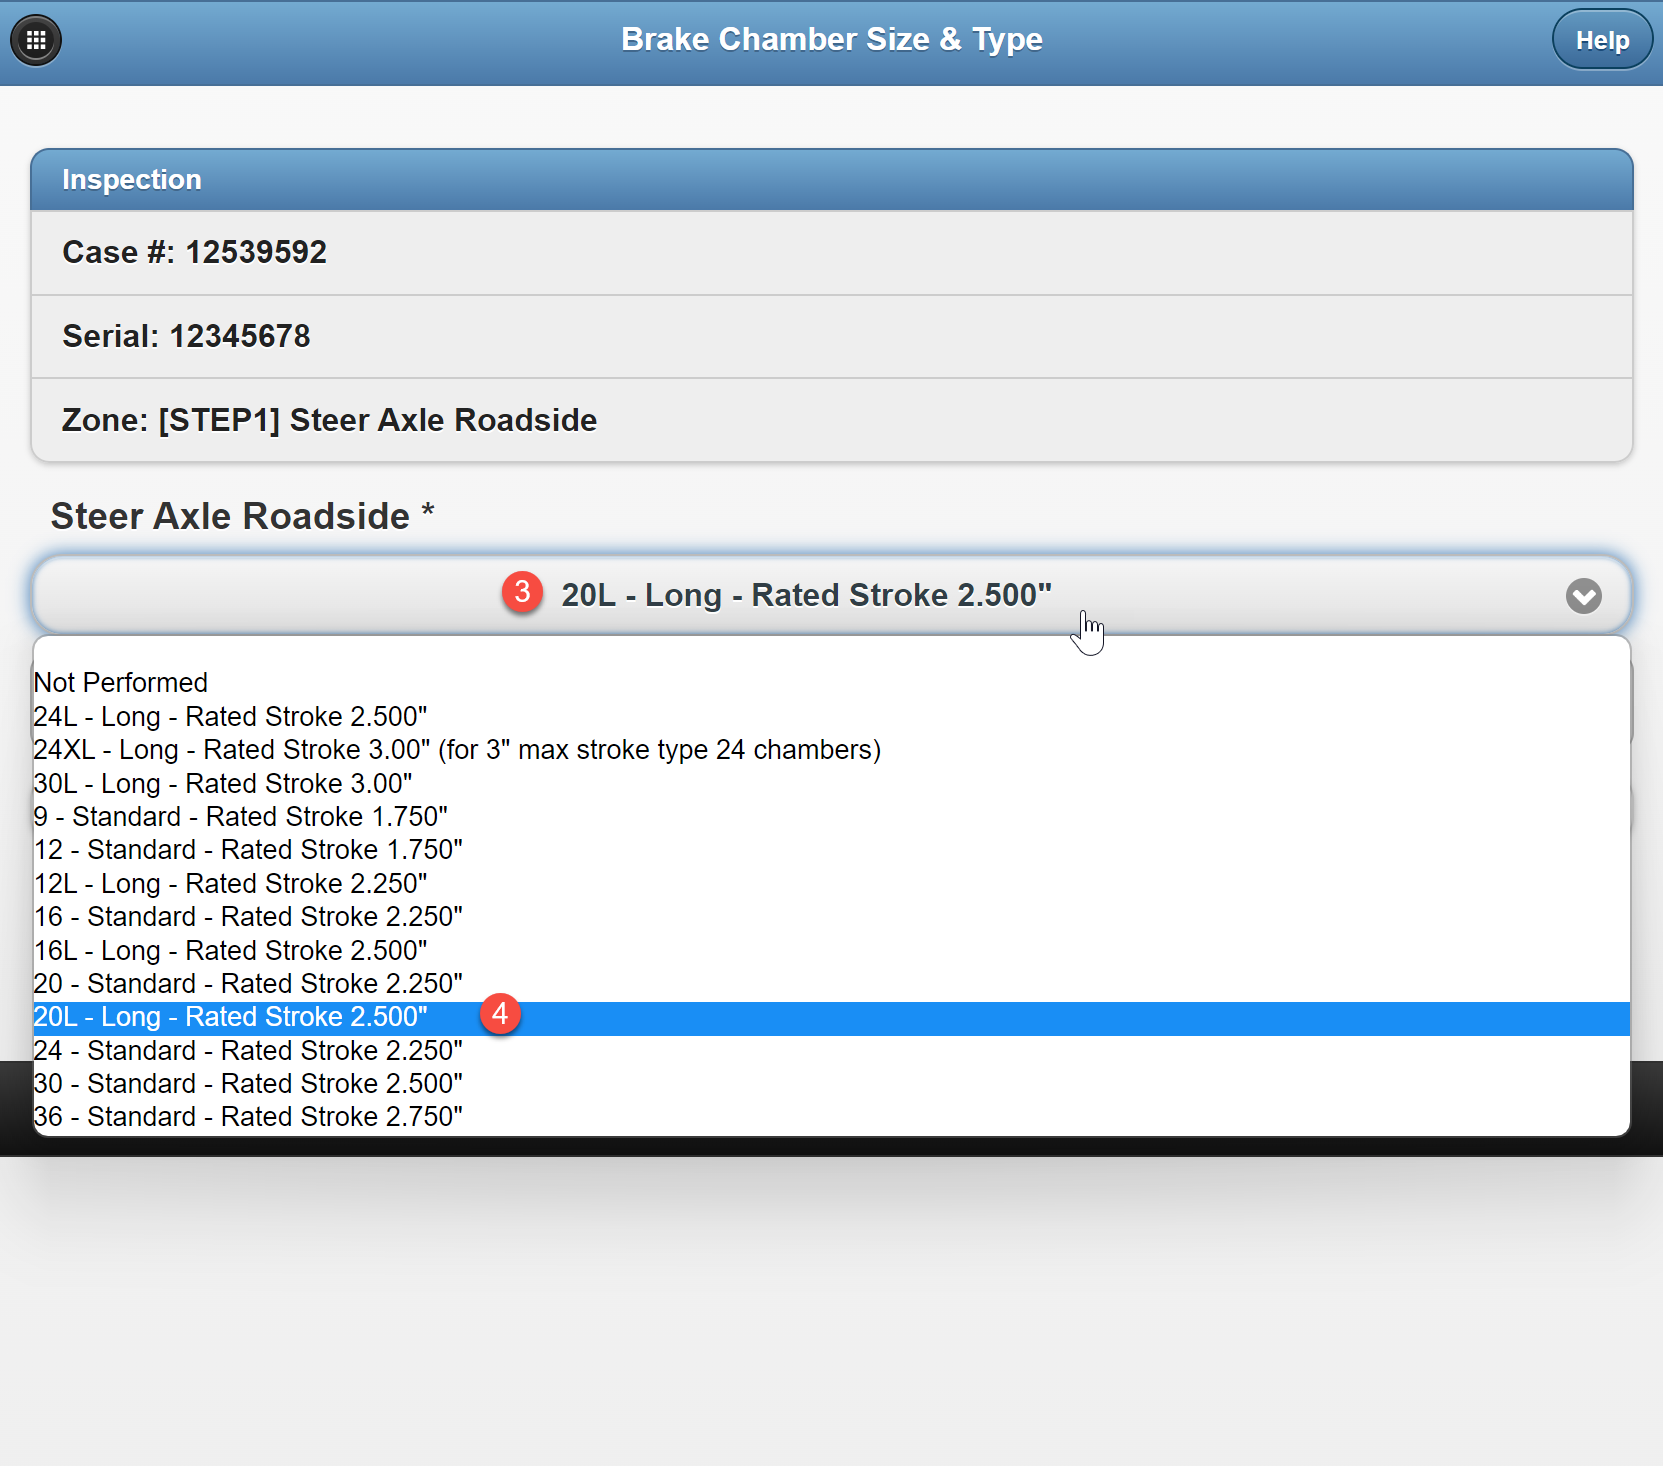
HOW TO PERFORM THE INSPECTION
PC Steps
***At this point the inspection has been added to the Case***
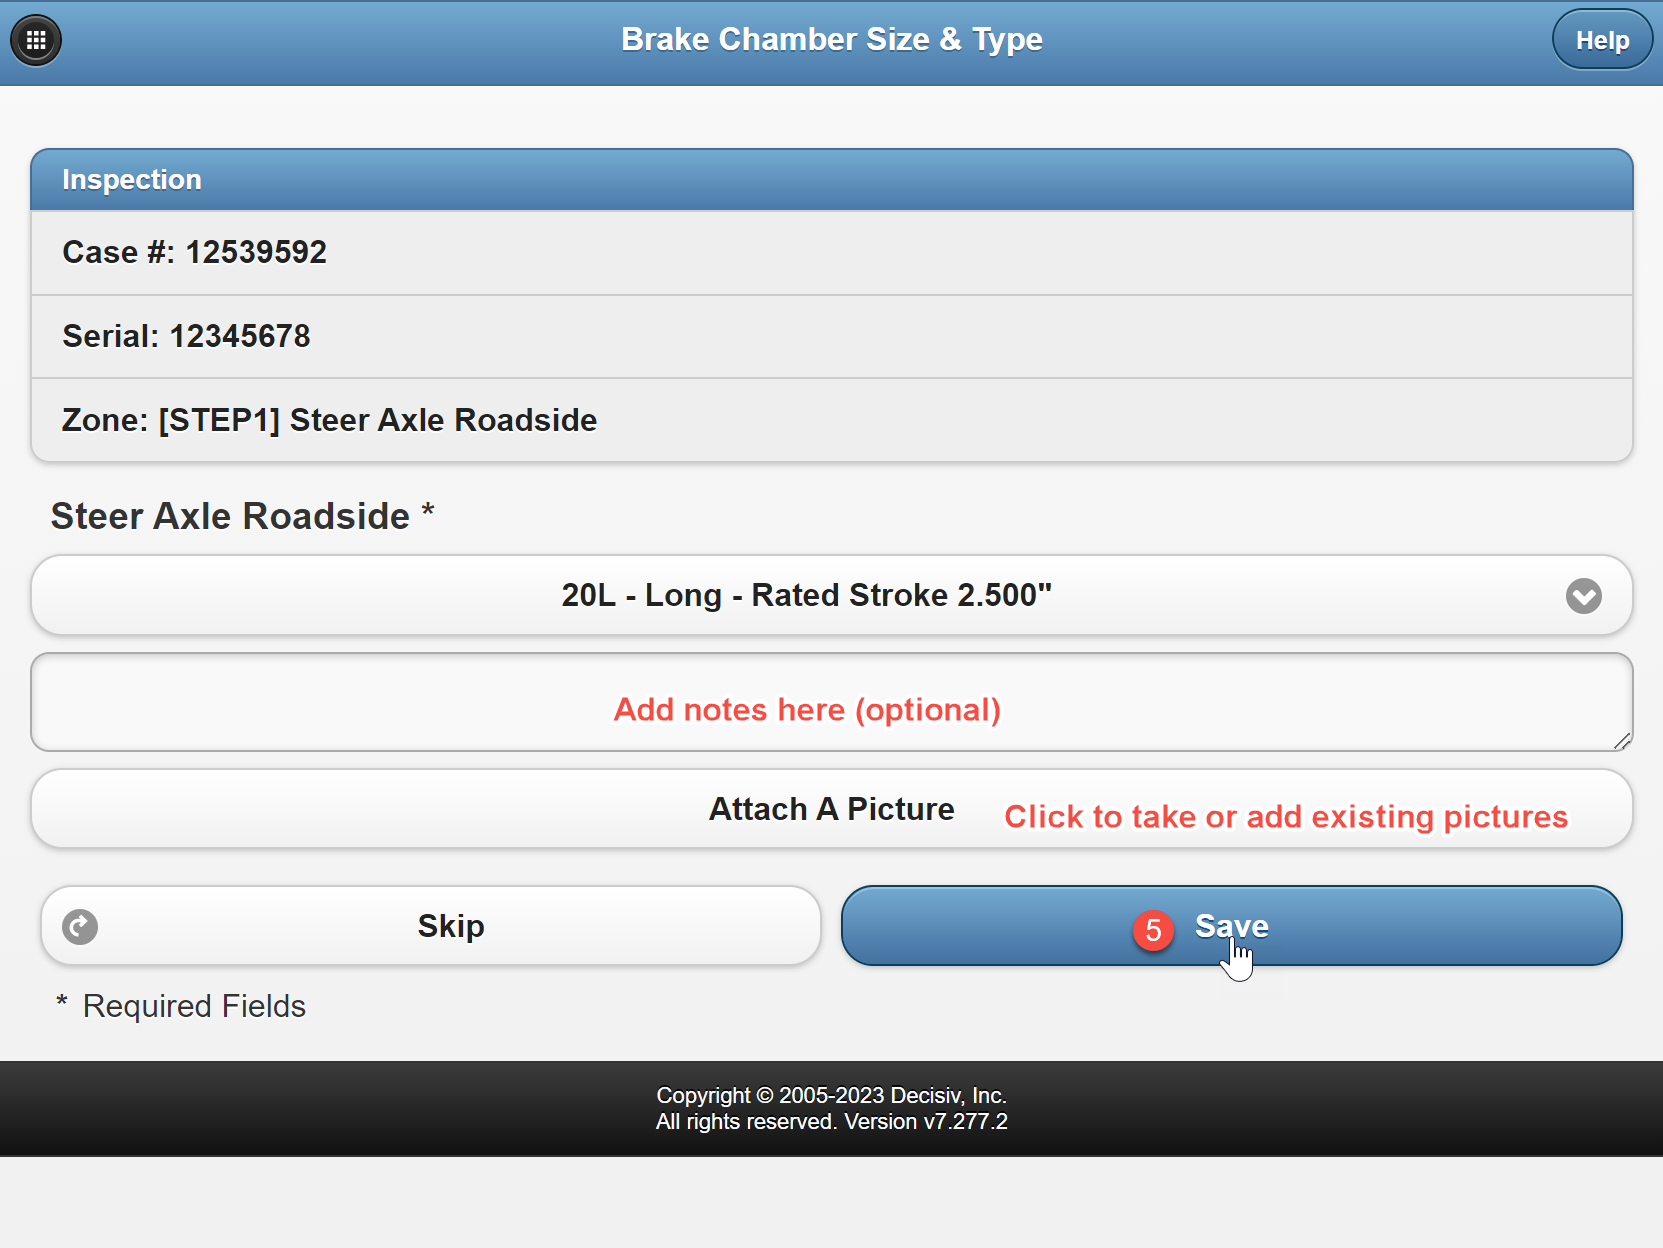
- To perform the inspection, click onto the inspection zone for (Step 1) Steer Axle Roadside.
- The next page will show you the inspection items for the entire zone.
- Click on the first inspection item in the zone and select the appropriate outcome. Adding notes and uploading pictures is optional but can also be done directly in the inspection item.
- Then click ‘Save’ once the information has been entered.
- Repeat these steps for every zone.
-
When you've selected an Outcome for all the Locations, click COMPLETE INSPECTION.
NOTE: Some Locations may be required and indicated as such with an asterisk (*). The COMPLETE INSPECTION button won't enable until you select an Outcome for all the required Locations. Any Locations without an Outcome will be marked as passing.
|
|
Comments
0 comments
Please sign in to leave a comment.